Sensor Setup (PX4)
The Sensor Setup section allows you to configure and calibrate the vehicle's compass, gyroscope, accelerometer and any other sensors (the available sensors will depend on the vehicle type).
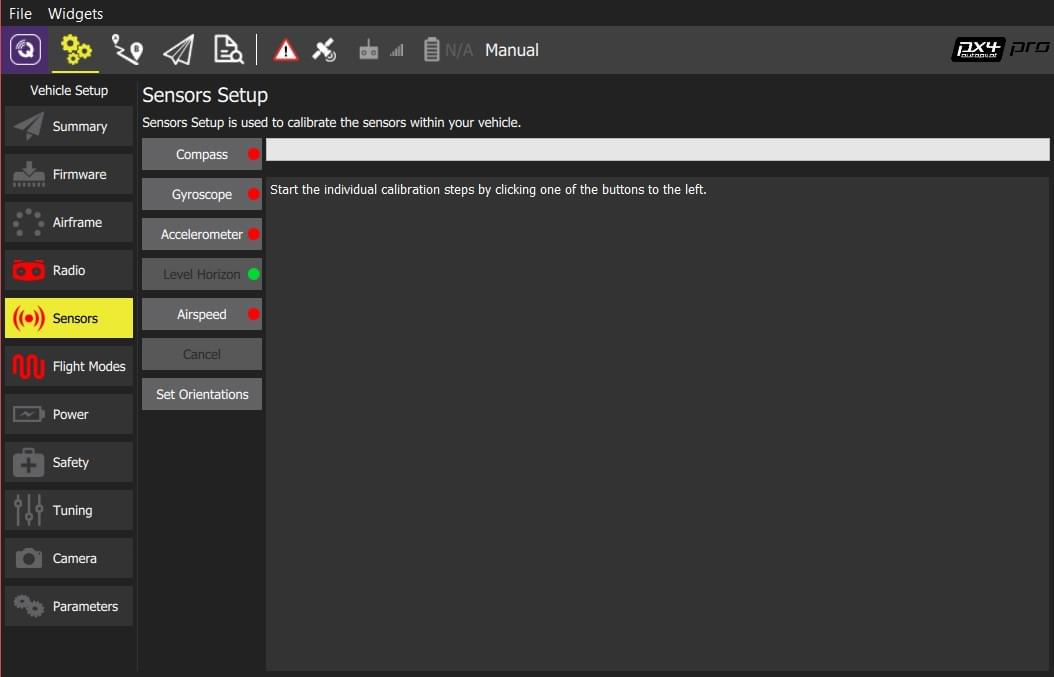
Available sensors are displayed as a list of buttons beside the sidebar. Sensors marked with green are already calibrated, while sensors marked with red require calibration prior to flight. Sensors with no light are simple settings with default values that you may choose not to calibrate.
Click on the button for each sensor to start its calibration sequence.
INFO
The image shown is from a VTOL vehicle running PX4 firmware. Other autopilot firmware and vehicles will offer slightly different options.
Compass
The process guides you to position the vehicle in a number of set orientations and rotate the vehicle about the specified axis.
The calibration steps are:
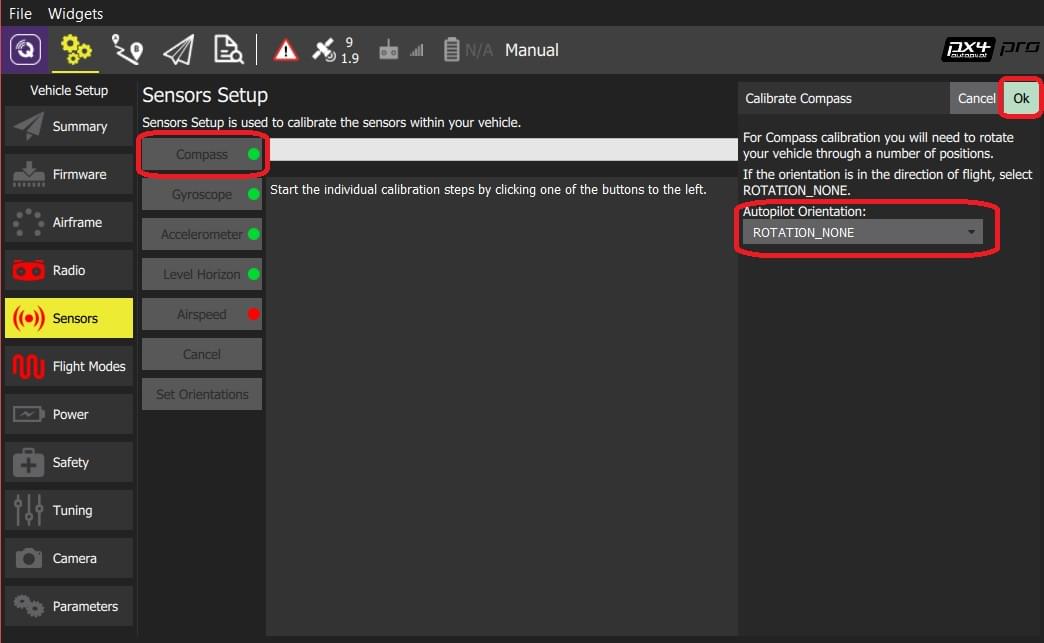
Click the Compass sensor button
INFO
The default flight controller orientation is
ROTATION_NONE(flight controller and compass mounted upright on the vehicle and facing the front). You can set a different value here or in Set Orientations.Click OK to start the calibration.
Place the vehicle in any of the orientations shown in red (incomplete) and hold it still. Once prompted (the orientation-image turns yellow) rotate the vehicle around the specified axis in either/both directions. Once the calibration is complete in that orientation the associated image on the screen will turn green.
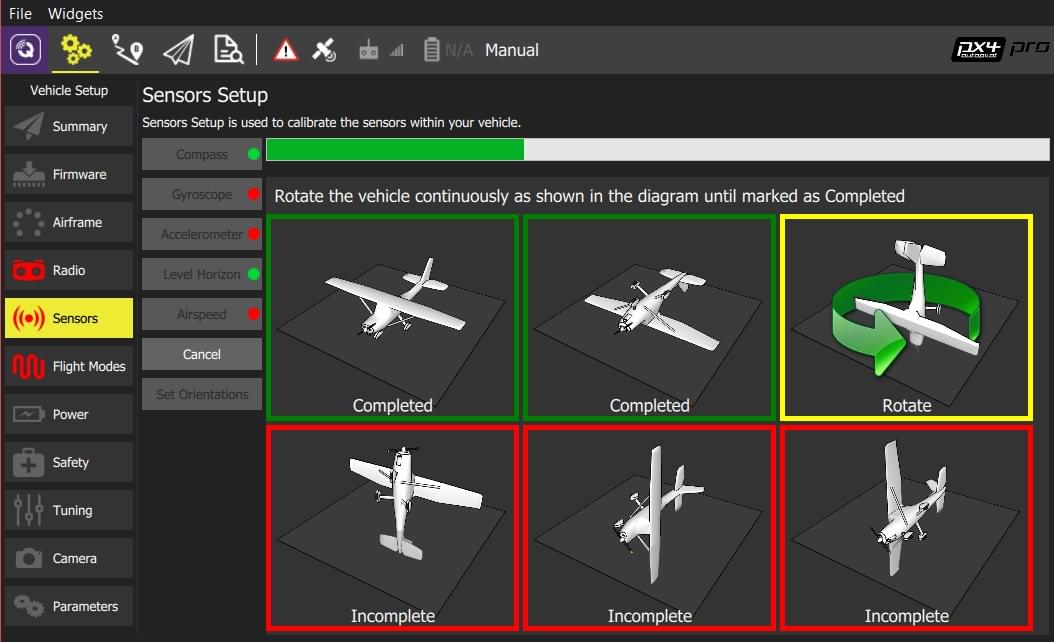
Repeat the calibration process for all vehicle orientations.
Once you've rotated the vehicle in all the positions QGroundControl will display Calibration complete (all orientation images will be displayed in green and the progress bar will fill completely) You can then proceed to the next sensor.
Gyroscope
You will be guided to place the vehicle on a flat surface and keep it still.
The calibration steps are:
Click the Gyroscope sensor button
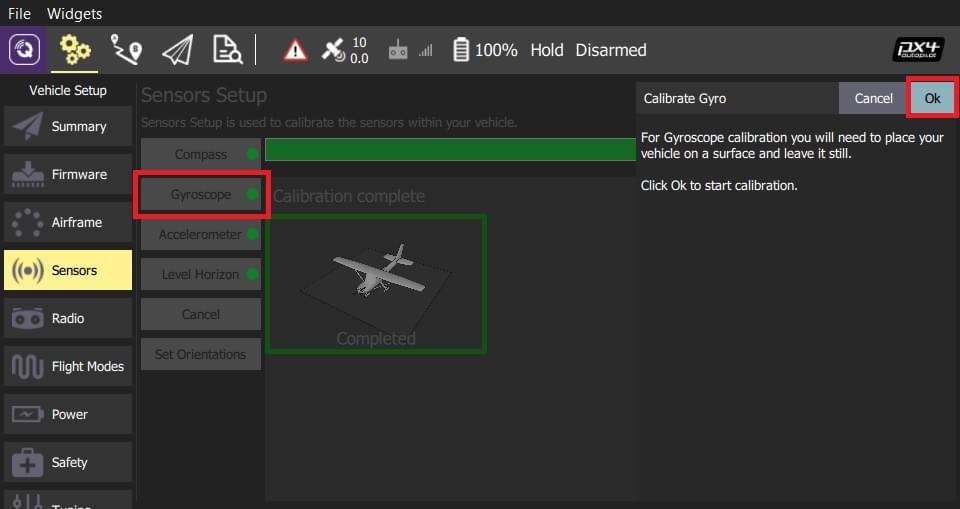
Place the vehicle on a surface and leave it still.
Click Ok to start the calibration.
The bar at the top shows the progress:
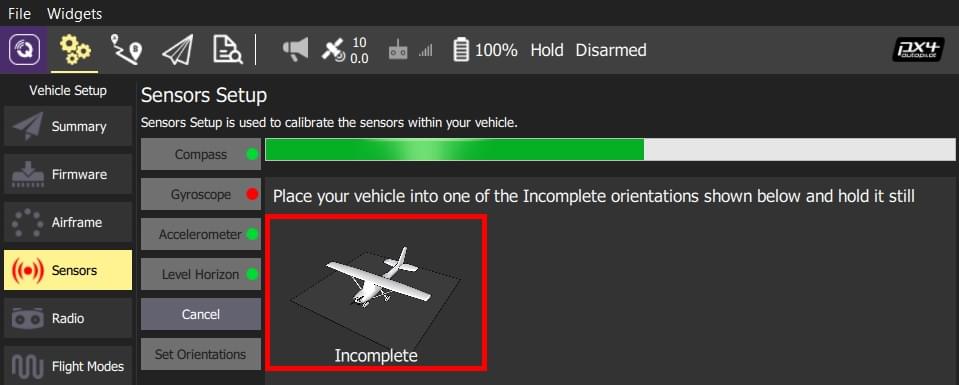
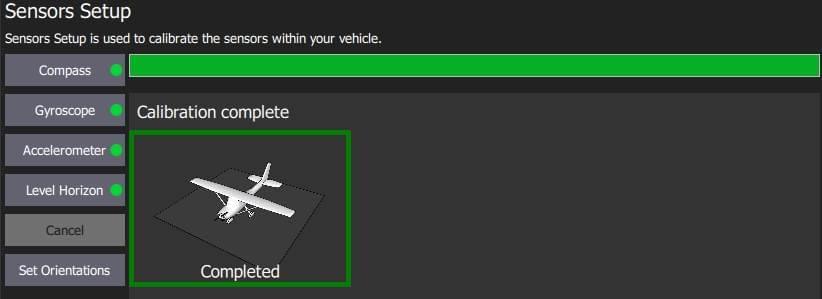
When finished, QGroundControl will display Calibration complete and the progress bar will fill completely.
INFO
If you move the vehicle during calibration, QGroundControl will automatically restart the calibration.
You can then proceed to the next sensor.
Accelerometer
To calibrate the flight controller accelerometers you will be asked to place and hold your vehicle a number of orientations (you will be prompted when to move between positions).
The calibration steps are:
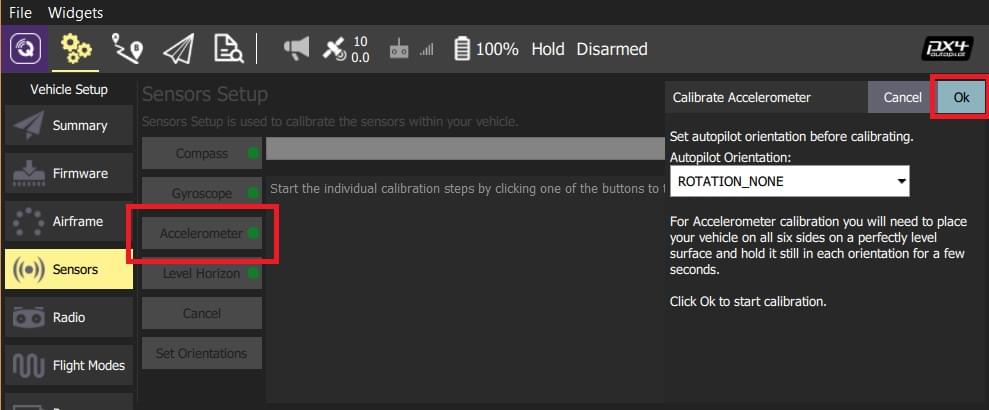
Click the Accelerometer sensor button.
INFO
You should already have set the Flight Controller Orientation above. If not, you can also set it here.
Click OK to start the calibration.
Position the vehicle as guided by the images on the screen. This is very similar to compass calibration.
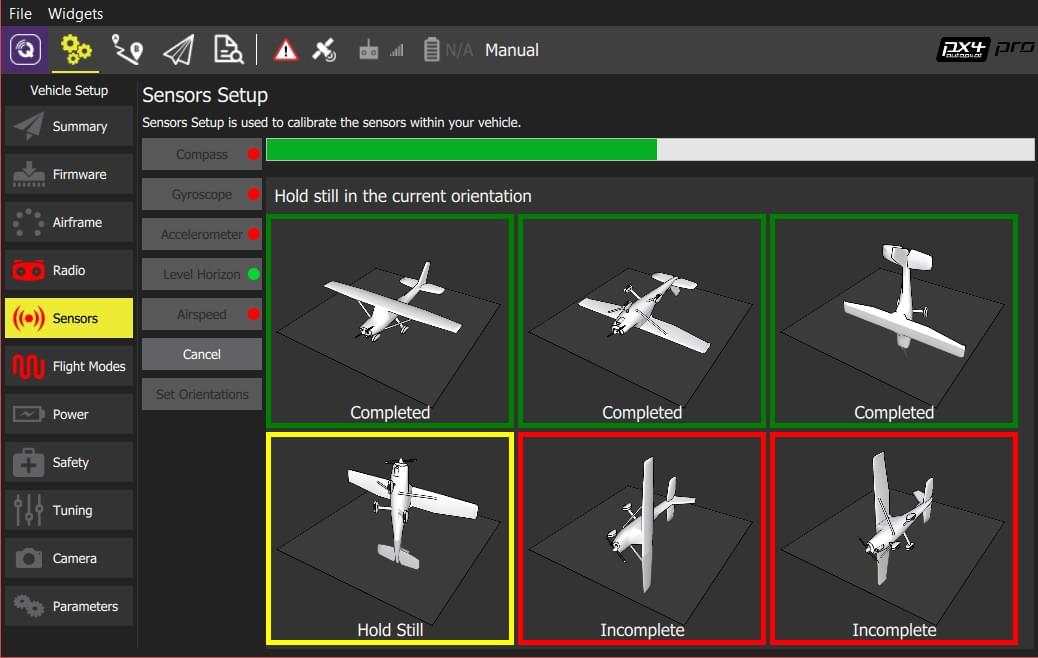
Repeat the calibration process for all vehicle orientations.
Once you've rotated the vehicle in all the positions QGroundControl will display Calibration complete.
You can then proceed to the next sensor.
Level Horizon
If the horizon (as shown in the HUD) is not level after completing accelerometer calibration you can calibrate the level horizon for your vehicle. You will be asked to place the vehicle in a level orientation while it captures the information.
Click the Level Horizon sensor button.
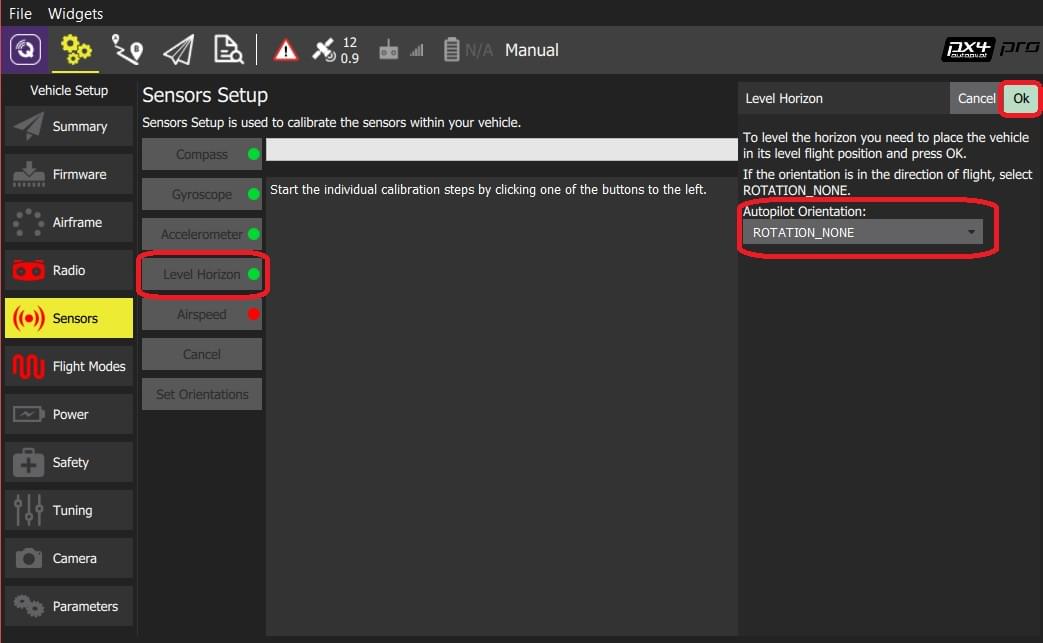
INFO
You should already have set the Flight Controller Orientation above. If not, you can also set it here.
Place the vehicle in its level flight orientation on a level surface:
- For planes this is the position during level flight (planes tend to have their wings slightly pitched up!)
- For copters this is the hover position.
- Click OK to start the calibration.
Airspeed
The airspeed calibration needs to read a stable baseline with 0 airspeed in order to determine an offset. Cup your hands over the pitot to block any wind (if calibrating the sensor indoors this is not needed) and then blow into the tube using your mouth (to signal completion of the calibration).
To calibrate the airspeed sensor:
Click the Airspeed sensor button
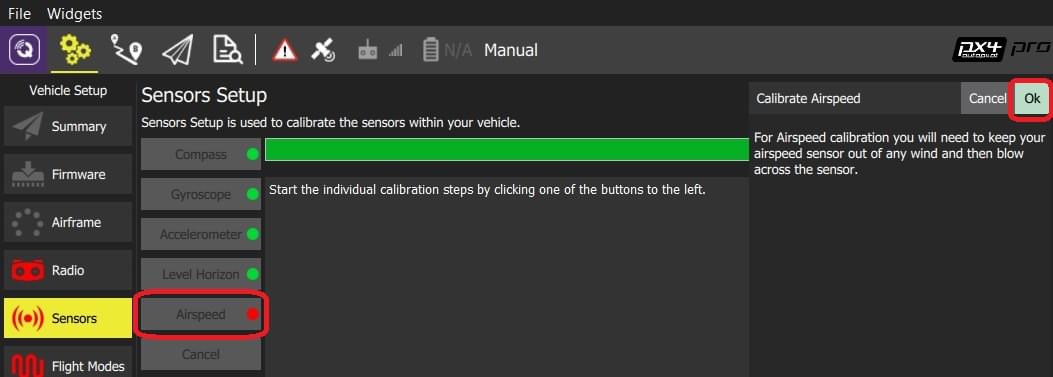
Cover the sensor (i.e. with your hand)
WARNING
Do not touch the sensor (obstruct any holes) during calibration.
Click OK to start the calibration.
Blow into the sensor.
Wait for 2-3 seconds before removing the covering (calibration completes silently after several seconds)
Set Orientations
TIP
You can skip this section if the flight controller and compass are mounted upright on the vehicle and facing the front (this is the default orientation - ROTATION_NONE).
If the autopilot/compass are mounted in any other way you will need to specify their orientations as YAW, PITCH and/or ROLL offsets relative to the forward-facing-upright orientation (clock-wise rotation around the Z, Y and X axis, respectively).
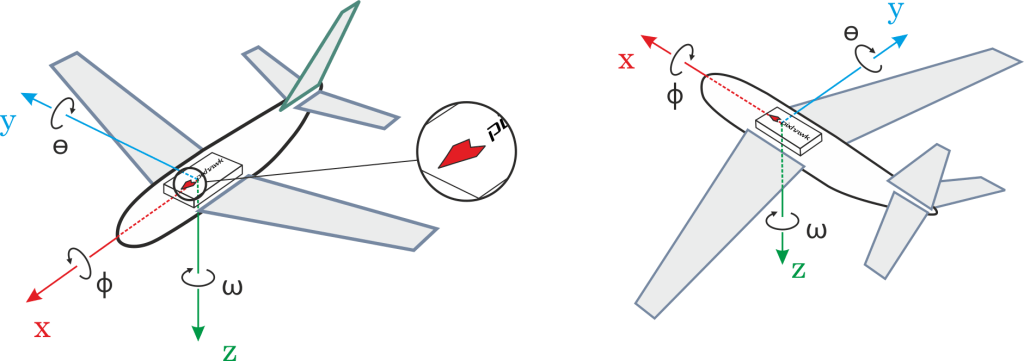
For example, the image below are at orientations: ROTATION_NONE, ROTATION_YAW_90,ROTATION_YAW_180,ROTATION_YAW_270.

To set the orientation(s) on PX4:
Select the Set Orientations button.
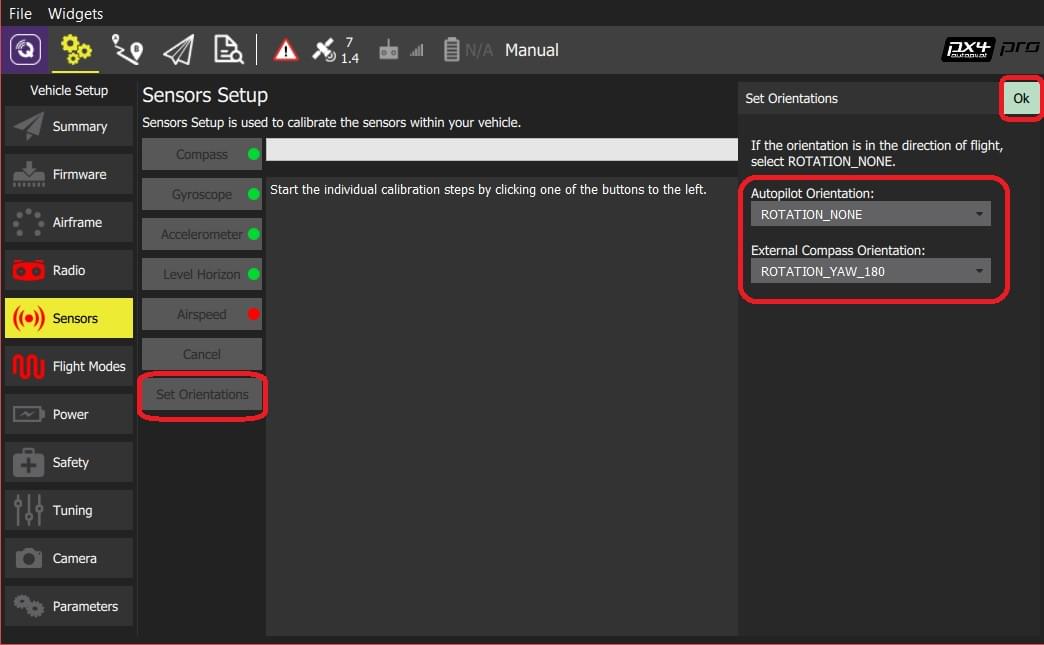
Select the AutoPilot Orientation.
Select the External Compass Orientation (this option will only be displayed if there is an external compass).
Press OK.