Getting Started with Source and Builds
This topic explains how to get the QGroundControl source code and build it either natively or within a Vagrant environment. It also provides information about optional or OS specific functionality.
Daily Builds
If you just want to test (and not debug) a recent build of QGroundControl you can use the Daily Build. Versions are provided for all platforms.
Source Code
Source code for QGroundControl is kept on GitHub here: https://github.com/mavlink/qgroundcontrol. It is dual-licensed under Apache 2.0 and GPLv3.
To get the source files:
Clone the repo (or your fork) including submodules:
shgit clone --recursive -j8 https://github.com/mavlink/qgroundcontrol.gitUpdate submodules (required each time you pull new source code):
shgit submodule update --recursive
TIP
Github source-code zip files cannot be used because these do not contain the appropriate submodule source code. You must use git!
Build QGroundControl
Using Containers
We support Linux builds using a container found on the source tree of the repository, which can help you develop and deploy the QGC apps without having to install any of the requirements on your local environment.
Native Builds
QGroundControl builds are supported for macOS, Linux, Windows, iOS and Android. QGroundControl uses Qt as its cross-platform support library and uses QtCreator as its default build environment.
macOS: v10.11 or higher
Ubuntu: 64 bit, gcc compiler
Windows: Vista or higher, Visual Studio 2019 compiler (64 bit)
iOS: 10.0 and higher
Android: Android 5.0 and later.
- Standard QGC is built against ndk version 19.
- Java JDK 11 is required.
Qt version: 5.15.2 (only)
WARNING
Do not use any other version of Qt! QGC has been thoroughly tested with the specified version of Qt (5.15.2). There is a significant risk that other Qt versions will inject bugs that affect stability and safety (even if QGC compiles).
For more information see: Qt 5 supported platform list.
INFO
Native CentOS Builds are also supported, but are documented separately (as the tested environment is different).
Install Visual Studio 2019 (Windows Only)
The Windows compiler can be found here: Visual Studio 2019 compiler (64 bit)
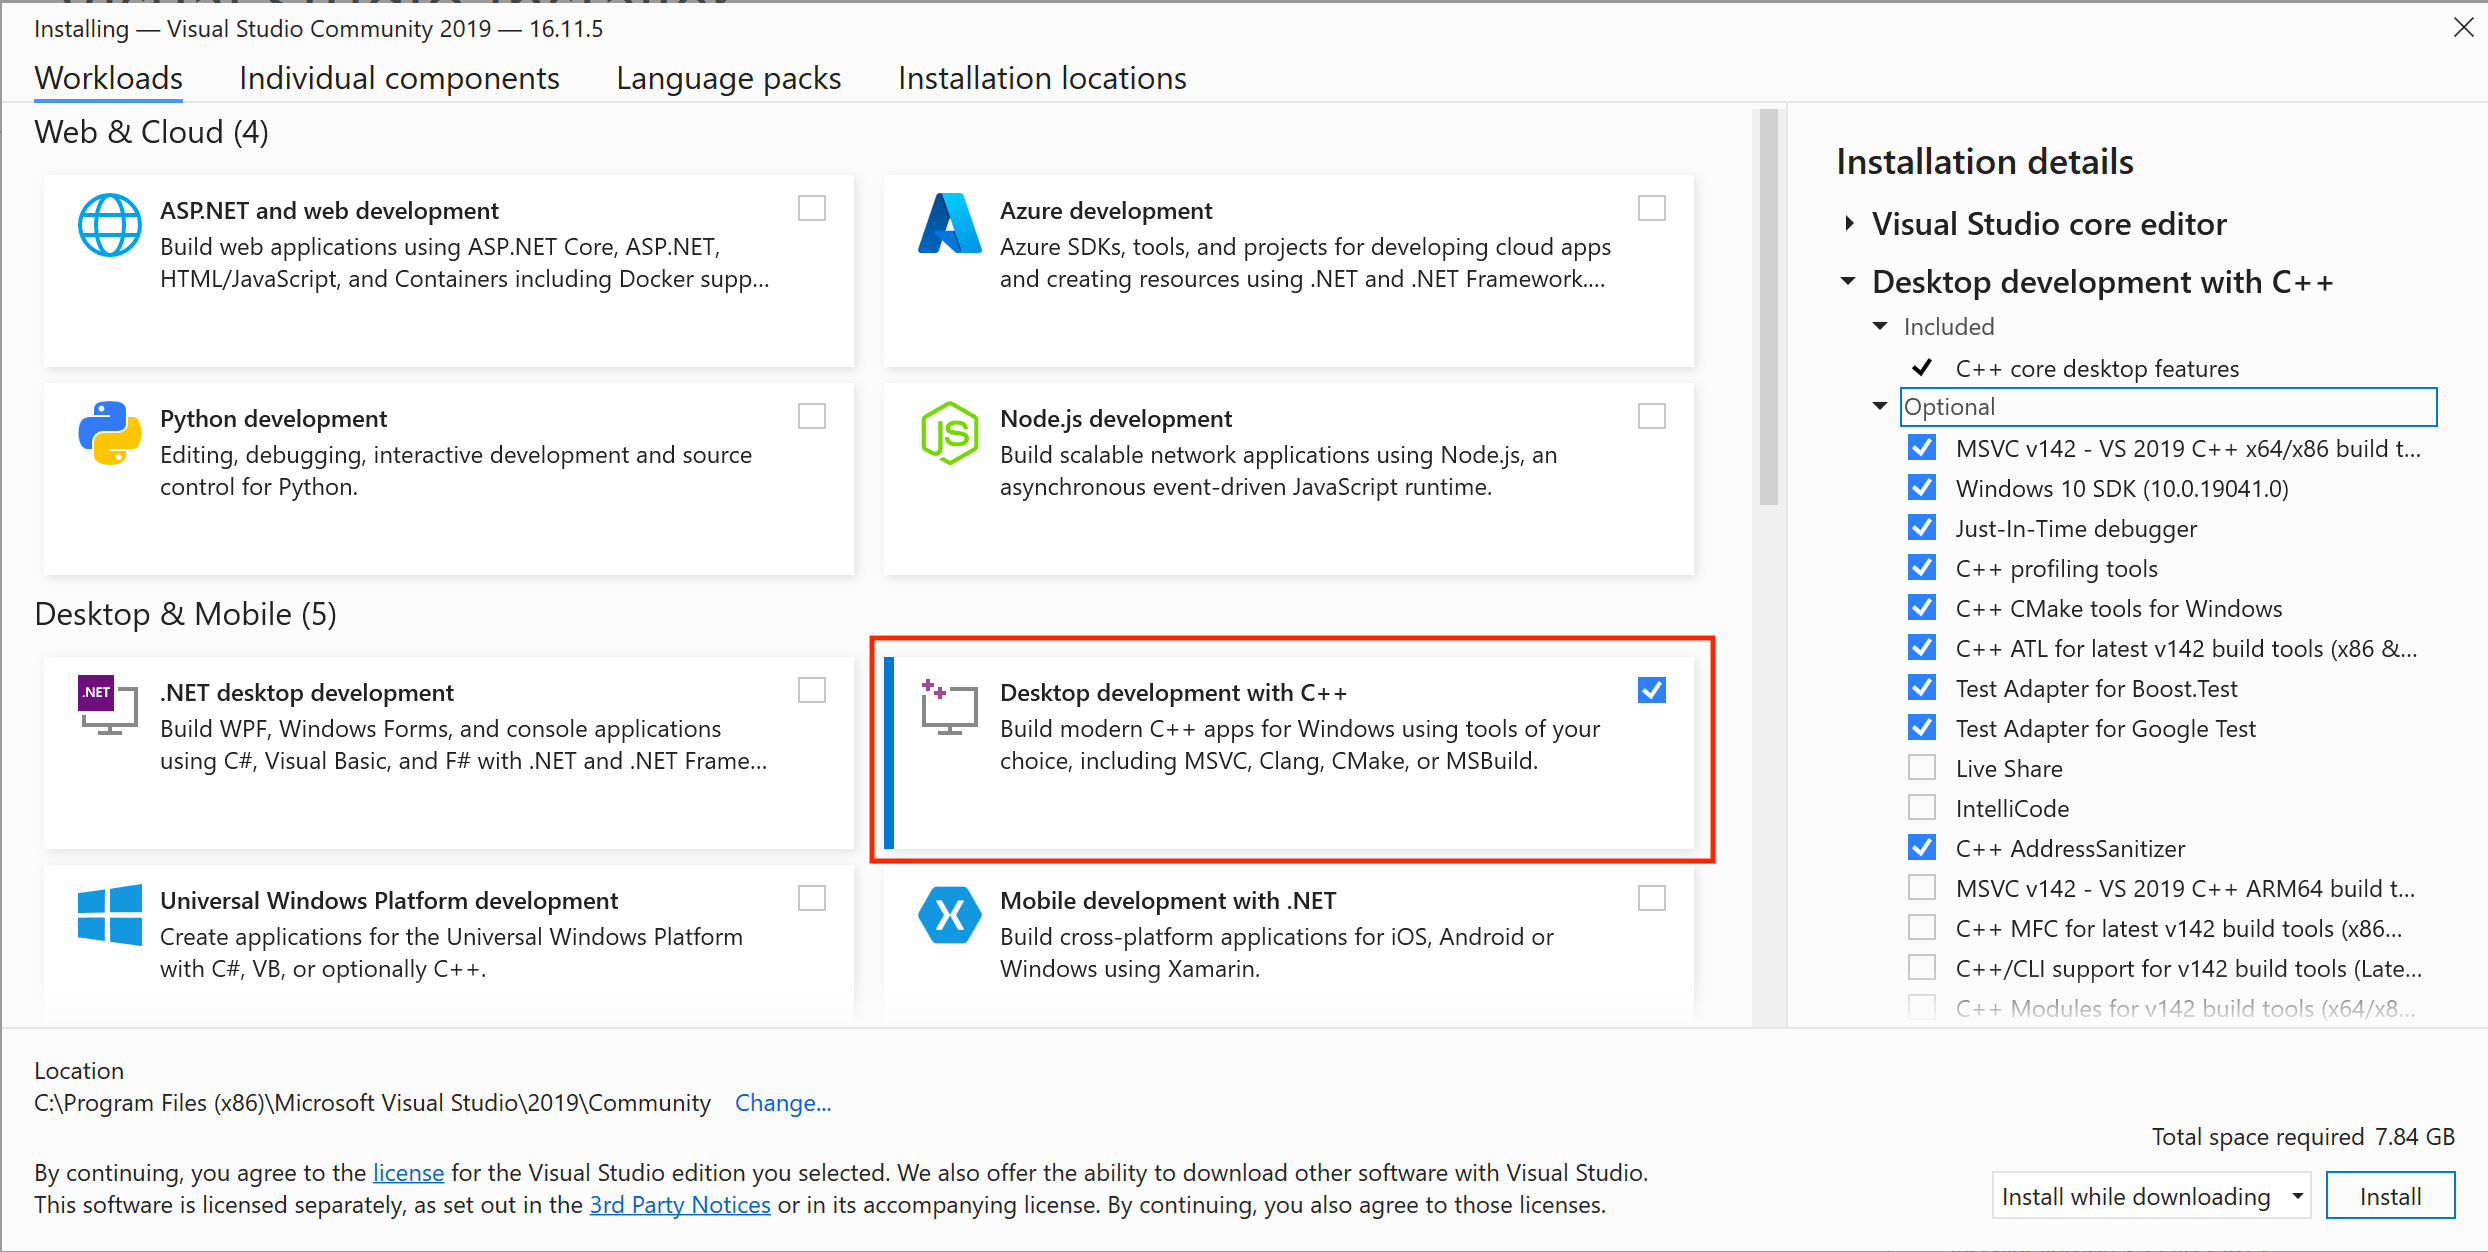
When installing, select Desktop development with C++ as shown:

INFO
Visual Studio is ONLY used to get the compiler. Actually building QGroundControl should be done using Qt Creator or qmake as outlined below.
Install Qt
You need to install Qt as described below instead of using pre-built packages from say, a Linux distribution, because QGroundControl needs access to private Qt headers.
To install Qt:
Download and run the Qt Online Installer
- Ubuntu:
- Set the downloaded file to executable using:
chmod +x. - Install to default location for use with ./qgroundcontrol-start.sh. If you install Qt to a non-default location you will need to modify qgroundcontrol-start.sh in order to run downloaded builds.
- Set the downloaded file to executable using:
- Ubuntu:
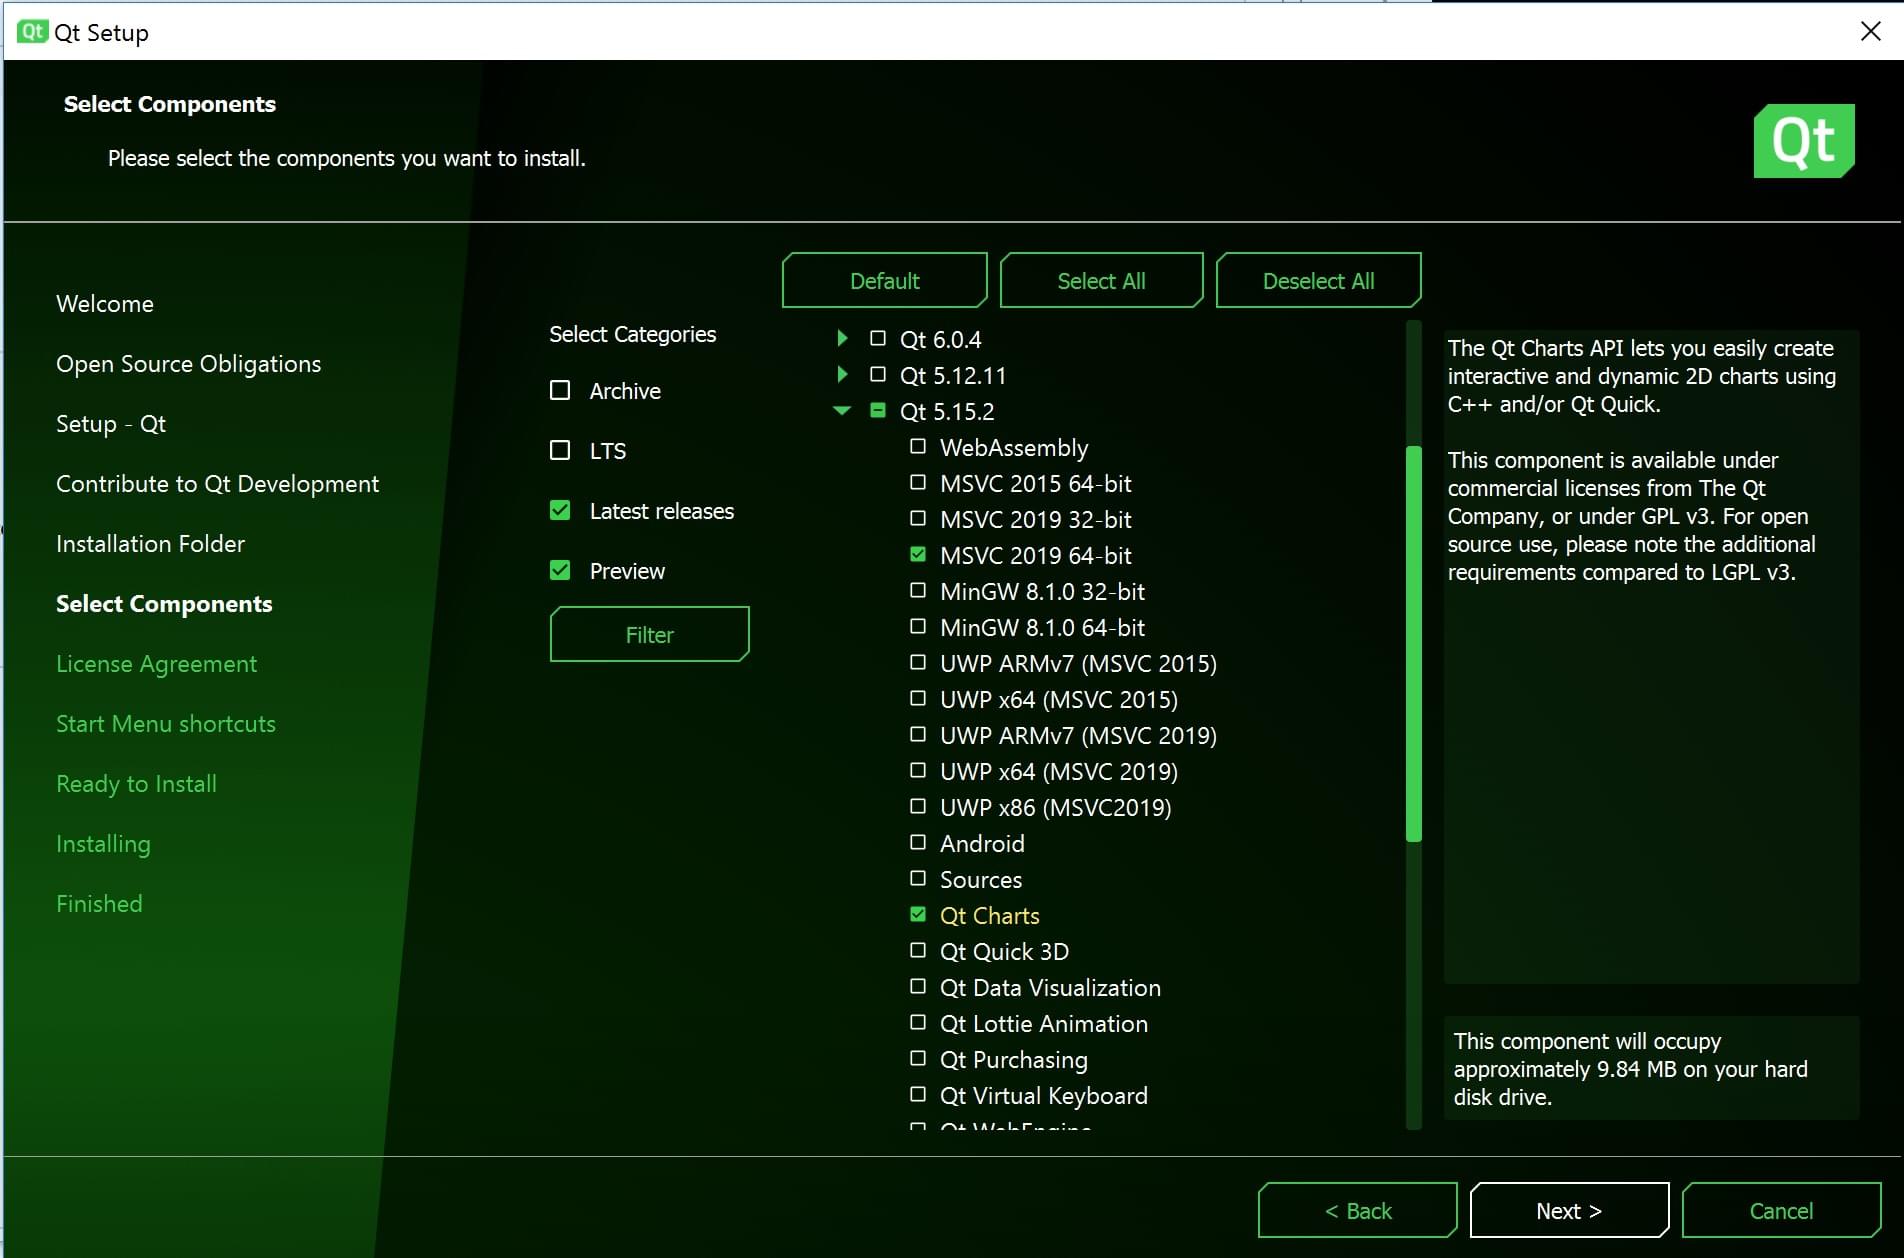
In the installer Select Components dialog choose: 5.15.2.
INFO
If the version needed is not displayed, check the archive (show archive and refresh).
Then install just the following components:
- Windows: MSVC 2019 64 bit
- MacOS: macOS
- Linux: Desktop gcc 64-bit
- All:
- Qt Charts
- Android ARMv7 (optional, used to build Android)

Install Additional Packages (Platform Specific)
Ubuntu:
sudo apt-get install speech-dispatcher libudev-dev libsdl2-dev patchelf build-essential curlFedora:
sudo dnf install speech-dispatcher SDL2-devel SDL2 systemd-devel patchelfArch Linux:
pacman -Sy speech-dispatcher patchelfAndroid: Qt Android Setup
INFO
JDK11 is required (install if needed)!
Install Optional/OS-Specific Functionality
INFO
Optional features that are dependent on the operating system and user-installed libraries are linked/described below. These features can be forcibly enabled/disabled by specifying additional values to qmake.
- Video Streaming/Gstreamer: - see Video Streaming.
- Airmap SDK: - TBD.
Disable platform-specific optional features that are enabled (but not installed), by default.
INFO
This currently applies to Airmap on Linux, which is optional but enabled by default.
Ubuntu:
Airmap: Create a file named user_config.pri (in the repo root directory) containing the text
DEFINES += DISABLE_AIRMAP. This can be done in a bash terminal using the command:shecho -e "DEFINES += DISABLE_AIRMAP\r\n" | tee user_config.pri
Building using Qt Creator
Launch Qt Creator and open the qgroundcontrol.pro project.
In the Projects section, select the appropriate kit for your needs:
OSX: Desktop Qt 5.15.2 clang 64 bit
INFO
iOS builds must be built using XCode.
Ubuntu: Desktop Qt 5.15.2 GCC 64bit
Windows: Desktop Qt 5.15.2 MSVC2019 64bit
Android: Android for armeabi-v7a (GCC 4.9, Qt 5.15.2)
- JDK11 is required. You can confirm it is being used by reviewing the project setting: Projects > Manage Kits > Devices > Android (tab) > Android Settings > JDK location.
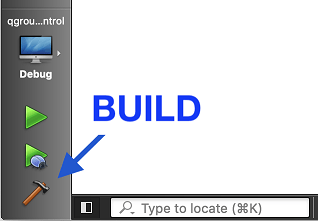
Build using the "hammer" (or "play") icons:

Build using qmake on CLI
Example commands to build a default QGC and run it afterwards:
Make sure you cloned the repository and updated the submodules before, see chapter Source Code above and switch into the repository folder:
shcd qgroundcontrolCreate and enter a shadow build directory:
shmkdir build cd buildConfigure the build using the qmake script in the root of the repository:
shqmake ../Run make to compile and link. To accelerate the process things you can use the
-j{number of threads}parameter.shmake -j12INFO
You can also specify build time flags here. For example, you could disable airmap inclusion using the command:
shDEFINES+=DISABLE_AIRMAP make buildRun the QGroundcontrol binary that was just built:
sh./staging/QGroundControl
Vagrant
Vagrant can be used to build and run QGroundControl within a Linux virtual machine (the build can also be run on the host machine if it is compatible).
- Download and Install Vagrant
- From the root directory of the QGroundControl repository run
vagrant up - To use the graphical environment run
vagrant reload
Additional Build Notes for all Supported OS
- Parallel builds: For non Windows builds, you can use the
-j#option to run parellel builds. - Location of built files: Individual build file results can be found in the
build_debugorbuild_releasedirectories. The built executable can be found in thedebugorreleasedirectory. - If you get this error when running QGroundControl:
/usr/lib/x86_64-linux-gnu/libstdc++.so.6: version 'GLIBCXX_3.4.20' not found., you need to either update to the latest gcc, or install the latest libstdc++.6 using:sudo apt-get install libstdc++6. - Unit tests: To run the unit tests, build in
debugmode withUNITTEST_BUILDdefinition, and then copydeploy/qgroundcontrol-start.shscript into thedebugdirectory before running the tests.
Building QGC Installation Files
You can additionally create installation file(s) for QGroundControl as part of the normal build process.
TIP
On Windows you will need to first install NSIS.
To add support for installation file creation you need to add CONFIG+=installer to your project file, or when you call qmake.
To do this in Qt Creator:
- Open Projects > Build > Build Steps > qmake > Additional arguments.
- Enter
CONFIG+=installeras shown: